
Detailing a 1967 Ferrari 275GTB/4 NART Spider by Mike Phillips at AutoForge.net
Step-by-Step How-to Video
In this video, Mike Phillips shows you step-by-step exactly how he approached detailing this class Ferrari including how to use RaggTopp to restore a dark, crisp look to complete the overall show car results.
You can't fix problems you can't see - SCANGRIP Swirl Finder Lights

Backstory
This is a very rare Ferrari, with very few ever produced making them highly collectable. NART stands for North America Racing Team. I'm fortunate to be trusted with a lot of restored and original classic Ferrari's from a good friend that restores these exotic classics here in South Florida.
Here's the car arriving in an Aerovault car hauler built by the famous automotive designer Peter Brock.


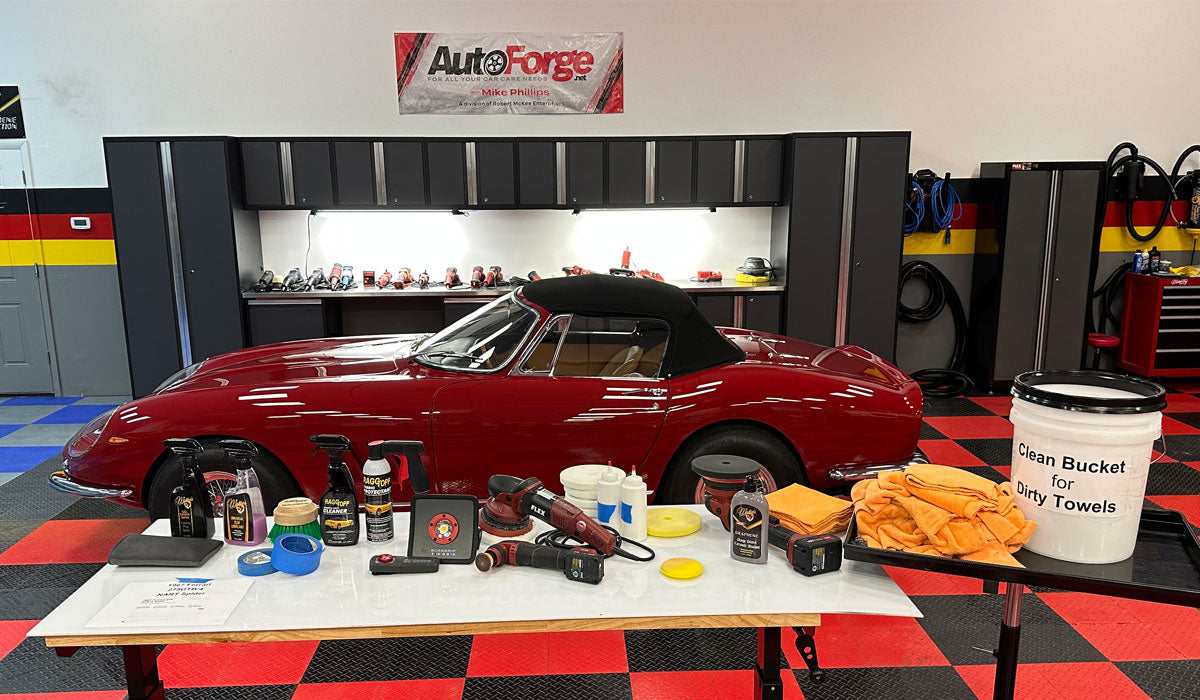
And here she is after moving her into the AutoForge Show Car Garage
Note under the current lights, the paint looks great already, but this is because there are some light diffusers in the ceiling that soften the light and at the same time, hide the true condition of the paint. We're working on adding new lights and removing the diffusers so stay tuned for a progress report.
Further down my write-up, I'll shine a SCANGRIP Multimatch R Detailing Light onto the paint and then you'll be able to see the true and accurate condition of the paint and then you'll understand why the car is here at the AutoForge Garage.

Products and Process
Below is the process I used to clean, mechanically decontaminate, polish and then seal the paint using McKee's Graphene Ceramic Paint Sealant.
Step 1: Waterless Wash using McKee's Coating Prep Spray.

Step 2: Inspecting the paint using the Baggie Test for above surface bonded contamination
The paint, glass and plastic headlight covers failed the baggie test as they all felt rough to the touch, especially the plastic headlight covers.


Step 3: Removing contamination using the McKee's Clay Mitt


Step 4: Inspecting the paint for swirls using a SCANGRIP Multimatch R Detailing Light
The SCANGRIP Multimatch R Detailing Light works great to show you the before condition of the paint as well as show you the progress you're making as you work around the car and for final inspection to make sure any wax, sealant or ceramic coating high spots are fully removed.


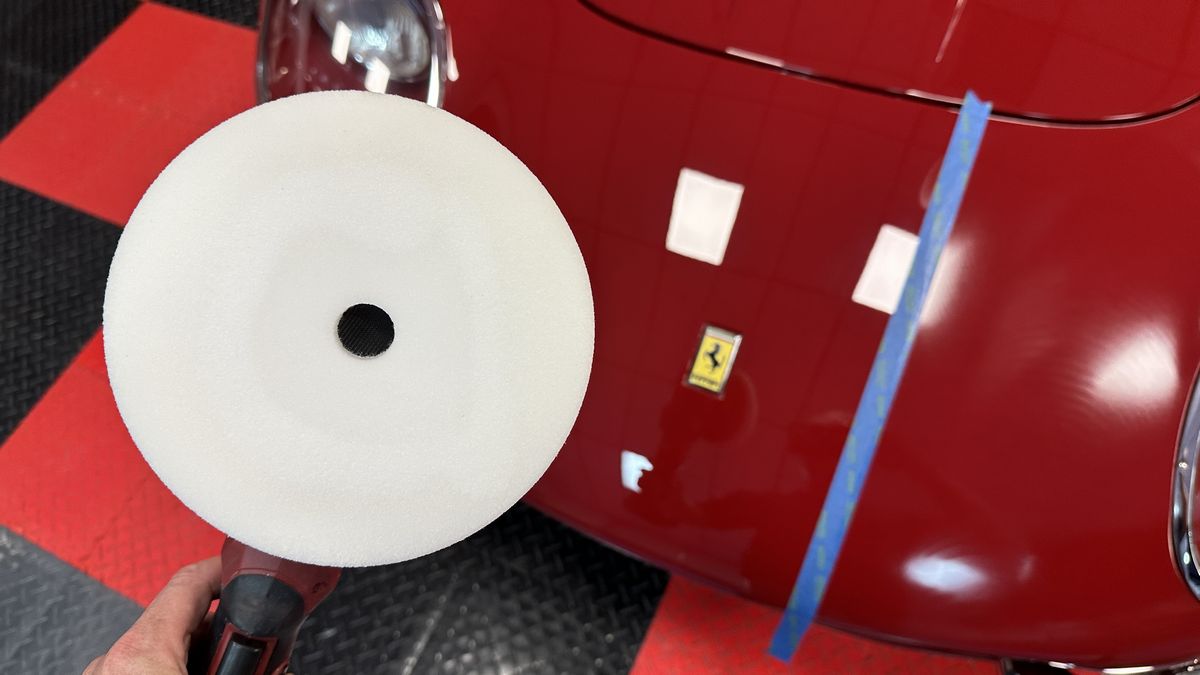
Here's how the paint really looks...


Tape Line
The tape line you see is for my Test Spot. I like to photo-document that the paint is uniformly swirled out all over the car including on the before side of my tape line where I'll do my first Test Spot to dial-in the least aggressive process to remove the swirls and scratches and restore a show car finish.

Step 5: Performing a Test Spot
The Test Spot is used to determine what combination of product, pad, tool and technique will be required to remove the swirls, scratches, water spots and oxidation to your satisfaction. Performing a Test Spot will also tell you if the paint is hard, soft or somewhere int-between.

Doing a Test Spot the BIG PICTURE
When doing your first Test Spot on a car you've never worked on before, it's a good Best Practice to start with a simple flat faced foam polishing pad and a medium or fine cut polish.
The pad below is a basic foam polishing pad. Perfect for doing Test Spots.

From left to right,
Yellow Cutting Pad, Orange Polishing Pad, White All-in-One Pad, (also a polishing pad), Black Finishing Pad - and for my Test Spot I'm going to use the white colored All-in-One foam polishing pad.

The FLEX CBEAST - Cordless BEAST
I have one of the original prototypes for this tool sent to me by FLEX in Germany. As I used this tool and started writing articles about it, I shortened the name from Cordless BEAST to CBEAST - basically borrowing the letter "C" from the word Cordless and putting it in front of the word BEAST. So there's a little FLEX tool trivia for you.
I'm going to do my Test Spot using the FLEX CBEAST. This is a great cordless 8mm gear-driven orbital polisher. I prefer to use this polisher when I can because it's so nice to not have to deal with an extension power cord, but when I want to go as fast as I can then I use either the Supa Beast or the original FLEX BEAST.
I know if the CBEAST can fix the paint defects then it's a for-sure-thing both the Supa Beast and BEAST can also do the job and do it faster.

Highly Recommended - Optional FLEX 6" Backing Plate
I did prototype testing for a lot of upcoming FLEX tools including the CBEAST, Supa BEAST and the cordless PE-150 Rotary Polisher. I'm sure FLEX had a great reason to launch both the CBEAST and the Supa BEAST with 5" backing plates, but from my own real-world use I strongly recommend if you purchase either of these tools or both of these tools - do yourself a HUGE favor and right from the get-go - purchase the optional 6" backing plate and do the FLEX Backing Plate Swap.
On AutoForge.net
6 inch Flex Backing Plate for XCE and XFE Polishers
Why? --> 3 Reasons
1: The FLEX 8mm gear-driven orbital polishers have a LOT of power and by swapping over to the larger backing plate you can then turn and churn larger pads WHICH leverage all the power better than smaller pads.
2: The larger footprint from a larger pad also smooths out the felt-action of the tool to you personally as you hold it when buffing.
3: Buffing pads are a substantial investment if you're serious about machine paint correction. By swapping to the larger backing plate from the start - you'll then be purchasing larger pads with your pad budget. If you don't take my advice now - but follow my advice later (eventually you're going to find out I'm right about this topic), you will have a bunch of small pads you can no longer use. Instead, invest your pad money wisely get the larger backing plate and then get larger pads. You can thank me later.
6.75 Inch Redline Buffing Pads
These pads fit or center-up perfectly on the larger, optional 6 inch FLEX backing plate with plenty of extra foam around the edge of the backing plate to create a SAFETY MARGIN of foam so you're never at risk of having the backing plate touch paint. This is especially important when you turn any of your FLEX gear-driven polishers up on edge to buff out thin panels. Again - I'm sharing this with you from YEARS of experience using the FLEX family of 8mm gear-driven orbital BEAST polishers.
6.75 inch Redline Buffing Pads

Lab Samples Compound & Polish
Nick brought me two products to test out, one is a polish the other a compound. I've been using them on all the cars I detail and I'm happy to say these two products work great. They use top shelf abrasive technology, have a limitless buffing cycle time also called "open time" with zero dusting and easy wipe-off.

3-Pea-sized Drops - LOL
Every time I hear or read someone recommending to use 3 pea-sized drops I feel bad for them because at least when you're starting out with a DRY pad, you need more product than 3 pea-sized drops. You NEED a FILM of abrasive technology on the paint working for you and also lubricating the surface as you abrade it.
Here's what Mike Phillips 3 pea-sized drops looks like for REAL WORLD DETAILING.

Section Passes
The pad in the picture below is after I ONLY spread the product out over the area I"m going to buff. You can see some of the product went into the pad, so now it's PRIMED and if you look at the paint on the right-hand side of the blue strip of tape - you can see I have a uniform layer of abrasive technology spread over this section ready for me to start making 8 Section Passes.
Section passes is a term I coined years go to help others understand how to buff out a car. It's real simple. When buffing out a car you divide larger panels into smaller sections and then buff the car out section by section. When you buff a section of paint, you make a series of passes over the section and these are called section passes.
Here's before and after results

Here's before


Here's after 8 section passes


Same before and after results on the rear of the Ferrari
Before


After 8 section passes


Results from my Test Spots
The results from my test spots on the hood and rear of car, show me a number of things,
1: The paint isn't hard. It's also not soft, it's right in the sweet spot where a car owners and a car detailers like it to be.
2: The swirls and scratches are not too deep but are in fact uniform throughout the body panels on this Ferrari. After 8 uniform section passes using a foam polishing pad and a polish I was able to remove 99.0% of the swirls and scratches without any RIDS or Random Isolated Deeper Scratches left behind. This is a great sign.
3: If I repeat this same process using the same type of pads and polish but jump up to the more powerful Supa BEAST - not only do I feel confident I can remove all the swirls and scratches but I can do this entire car in around 3 hours or less.
Next I'll start in the center of the hood and then work my way around and down the various body panels until I've buffed out the entire car.
Traffic Film or Dirt Stained Paint
Also note the brownish, yellowish color of my pad after buffing a section of paint? This means the paint on this Ferrari not only has swirls and scratches, but it also has a built-up layer of dirt ON the paint. This dirt film layer, also called Traffic Film happens over time.
It's real common for daily drivers in geographical areas of rain. Over time, most cars develop some form of leak or leaks where they drip motor oil, transmission fluid, power steering fluid, radiator fluid, gear oil, etc. onto the road as the owner drives the car. Then when it rains, this oily gunk mixes with the water on the road and the cars driving in front of you spray your car with this oily, dirty mixture and over time, you get a build-up on the outside of your car.
This discoloring can also come from old layers of wax that with age, can yellow or become cloudy.

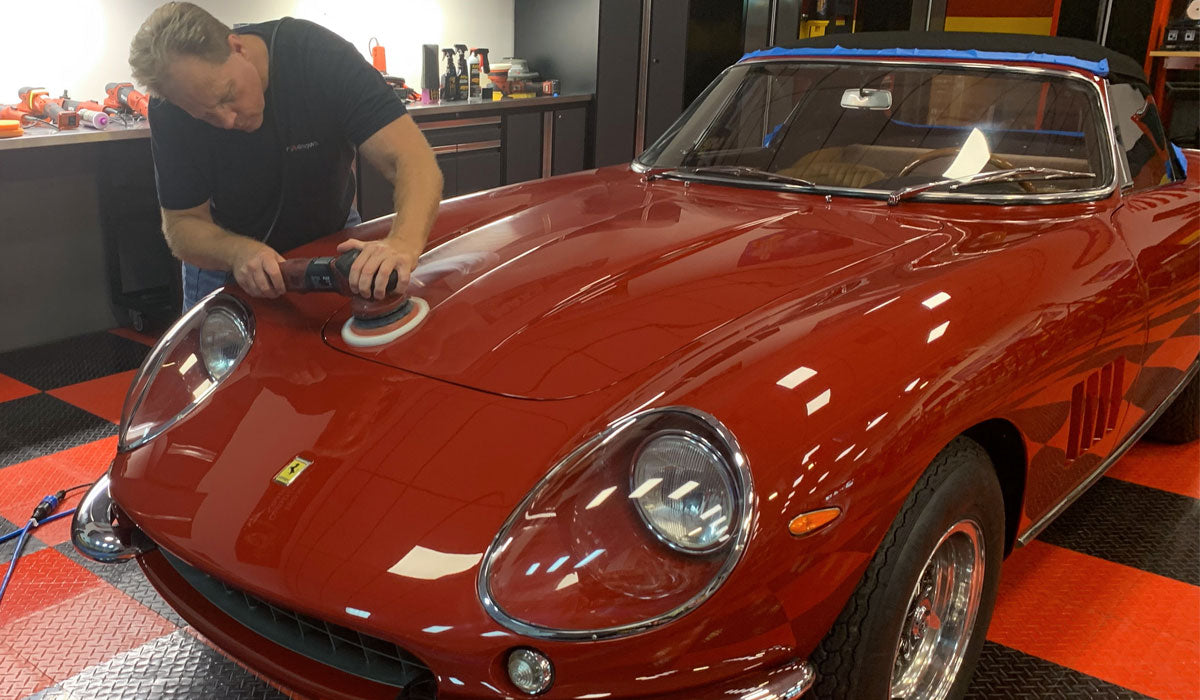
Step 6: Performing the paint correction step
After I dial-in and proved my process of using the new polish, with a foam polishing pad and the FLEX CBEAST works to remove the swirls and scratches to my satisfaction, I switched over to the Supa BEAST because it has more power than the CBEAST and this means I can go faster to get this car buffed out in a timely manner.


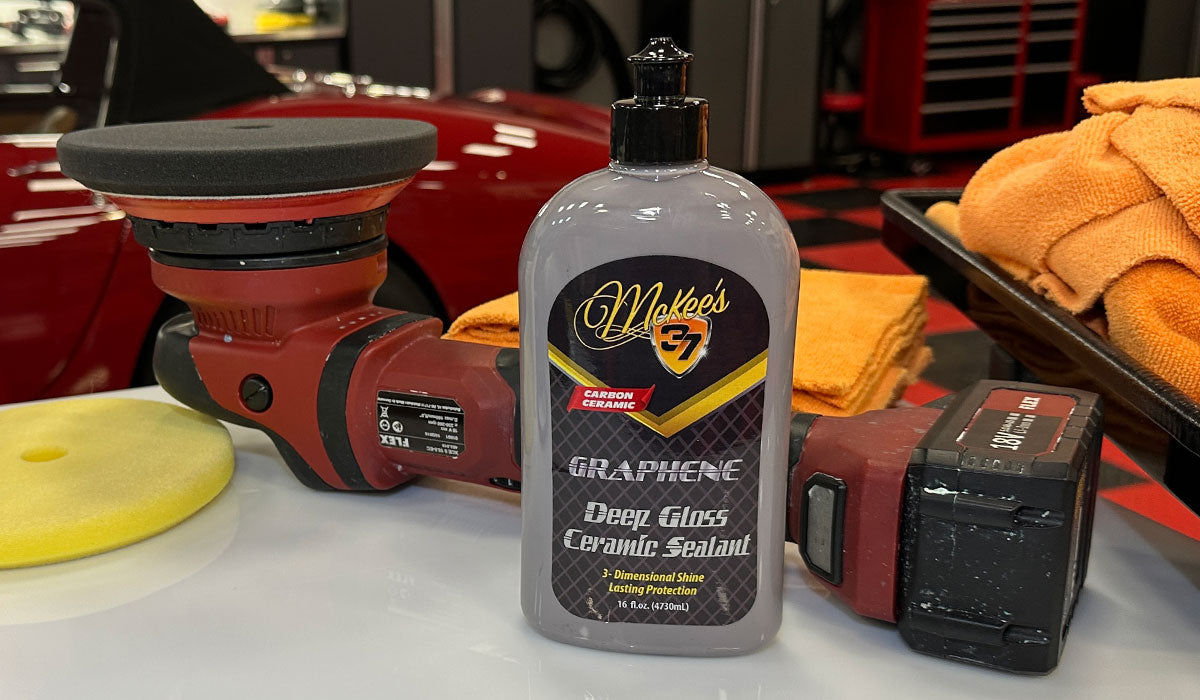
Step 7: Machine apply McKee's 37 Graphene Deep Gloss Ceramic Sealant
After all the body panels were polished, next up I need to seal the paint. The compound and polish I'm testing are referred to as dedicated products. This means they are specifically for removing defects, they do not leave any protection behind, thus I need to follow them with a dedicated product to seal the paint.
McKee's 37 Graphene Deep Gloss Ceramic Sealant
For this step, because I no longer need the power of the corded Supa BEAST, I switched over to the FLEX CBEAST and machine applied the McKee's 37 Graphene Deep Gloss Ceramic Sealant using a Redline Black Foam Finishing Pad.
Technique Tip
When using an orbital polisher to machine apply a liquid wax or sealant, with the polisher turned OFF - always apply products directly to the face of a buffing pad and then touch the pad down onto the surface to spread the product out. Next turn the polisher onto a slow to medium speed and pick-up the product under your pad as you move the polisher around to spread the product out of the area to be buffed/sealed.

The FLEX CBEAST is so easy to use for this type of work.


Methodically work around and down the car until each panel is covered with the sealant. Allow the graphene sealant to dry to a haze and then remove using clean, uncontaminated microfiber towels.


Here's the final results...


Vintage Headlight Covers
These unique headlight protectors were just as swirled-out as the paint but the new polish I'm testing removed the swirls and scratches to restore perfect optical clarity plus add to the overall beauty of the car.


A brand new looking paint job!
Not only did machine polishing remove the swirls and scratches it also removed the dirt staining you saw via the yellowish/brownish looking foam pad shown above. The effect this had was to restore the original brilliance and full richness of color to the paint job.


Products used
McKee's 37 Coating Prep Spray
McKee's 37- Universal Clay Lubricant and Clay Mitt Combo
RAGGTOPP Convertible Top Fabric Cleaner & Protectant Kit
RaggTopp Premium Convertible Top Brush
SCANGRIP Swirl Finder Lights
FLEX XCE 8-125 "CBEAST" 18.0 Dual Action Cordless Polisher Set
FLEX XCE 10-8 125 "Supa BEAST" Dual Action Polisher
6 inch Flex Backing Plate for XCE and XFE Polishers (For the CBEAST and Supa BEAST)
FLEX 'The BEAST' XC 3401 VRG Dual Action Orbital Polisher
FLEX XC3401 5.5 Inch Backing Plate - Spare Backing Plate for the BEAST
FLEX PXE 80 12-EC Cordless Mini Polisher Deluxe Kit
Redline 6.75" Yellow Foam Cutting Pad - Fits FLEX Orbital Polishers
Redline 6.75" Orange Foam Polishing Pad - Fits FLEX Orbital Polishers
Redline 6.75" White All-In-One Foam Polishing Pad - Fits FLEX Orbital Polishers
Redline 6.75" Black Foam Finishing Pad - Fits FLEX Orbital Polishers
McKee's 37 Graphene Deep Gloss Ceramic Sealant
Orange Brushed Edgeless 365 Premium Microfiber Terry Towel - 25 Pack
Yellow Foam Wax Applicators - 6 Pack
Yellow Foam Wax Applicators - 12 Pack


Nice product!
The McKee's 37 Graphene Deep Gloss Ceramic Sealant really worked great. It was easy to apply via machine but even more important - it wiped off effortlessly and created a deep, wet slippery shine!

Ready to go home!

Learn to detail Ferrari's or any car like a professional!
![]()
Whether you detail cars professionally, want to start a car detailing business or if you just want to learn how to detail your own cars, you can flatten out the learning curve and have a lot of fun taking the Mike Phillips & Nick Rutter 100% Hands-on Detailing Classes!
Click this link to learn more, see a detailed list of topics covered or sign-up.
Questions?
Mike Phillips
Mike@AutoForge.net
760-515-0444